Table of Contents
ToggleTiny house villages are popping up across the country as an answer to housing shortages, affordability crises, and the growing desire for intentional, community-focused living. But dropping a handful of tiny homes on a lot and calling it a village? That’s a recipe for chaos, cramped pathways, infrastructure headaches, and neighbors who can hear every sneeze through paper-thin walls. A thoughtful tiny house village layout balances density with livability, privacy with connection, and shared resources with individual autonomy. Whether planning a cooperative community, a rental village, or a family compound, the layout determines whether residents thrive or flee.
Key Takeaways
- A thoughtful tiny house village layout balances density, privacy, and shared resources by prioritizing pedestrian circulation, defining public and semi-private zones, and planning for future expansion.
- Proper spacing and setbacks (typically 10–15 feet between homes) prevent utility conflicts, enable maintenance access, and create privacy buffers that reduce noise and sight-line issues.
- Popular tiny house village layout configurations include cluster, linear, radial, perimeter, and hybrid designs, each suited to different site conditions and community goals.
- Essential shared amenities like bathhouses, laundries, mail kiosks, and community gardens must be positioned strategically to minimize walking distances and separate high-use facilities from bedroom zones.
- Infrastructure sizing—including water mains (1.5–2 inch lines for 10+ homes), electrical service (400–600 amps minimum), and stormwater management—must be planned upfront to avoid costly retrofitting.
- Strategic landscaping, staggered home orientations, and retreat spaces help residents enjoy both community connection and solitude without relying solely on rules and enforcement.
What Is a Tiny House Village and Why Layout Matters
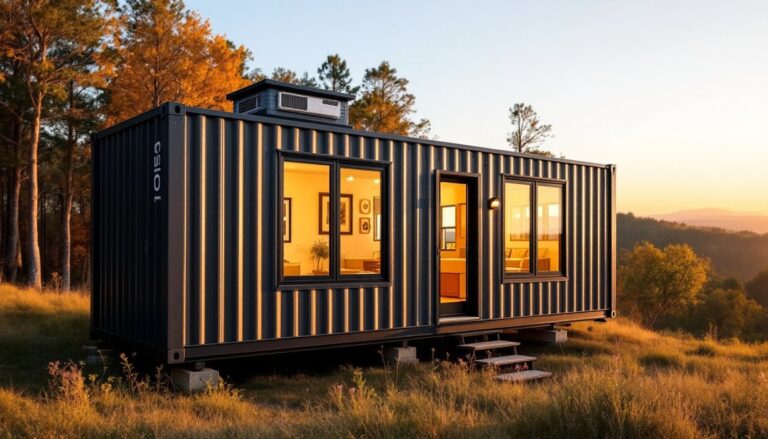
A tiny house village is a planned community of compact dwellings, typically under 400 square feet each, designed to share land, utilities, and often communal amenities. These aren’t RV parks or informal clusters: they’re intentional developments with shared infrastructure, governance structures, and design cohesion.
Layout matters because tiny homes magnify spatial problems. A poorly planned village creates bottlenecks at water hookups, forces residents to park a quarter-mile from their front door, or positions bedroom windows three feet from a neighbor’s outdoor shower. Good layout anticipates traffic flow, utility runs, emergency access, and the psychological need for both community and solitude.
Most jurisdictions classify tiny house villages under Planned Unit Development (PUD) or Residential Cluster Development codes, which allow smaller lot sizes in exchange for shared open space. Some localities have adopted specific tiny house appendices to the International Residential Code (IRC), but many still treat them as accessory dwelling units (ADUs) or recreational vehicles. Confirm local zoning before breaking ground, layout flexibility often hinges on which code pathway applies.
Essential Design Principles for Tiny House Village Layouts
Successful villages start with a few non-negotiable design principles that prevent regret six months in.
Prioritize pedestrian circulation over vehicle access. Tiny house living thrives when walkability is emphasized. Design primary pathways at least 4 feet wide for comfortable two-way foot traffic, with accessible routes that meet ADA slope requirements (1:12 max) if the community aims for inclusivity. Vehicle access can be limited to perimeter roads or shared parking clusters.
Plan for expansion and phasing. Even if starting with six units, lay out utilities and roads to accommodate future growth. Stub out water lines, oversize electrical panels, and leave buffer zones for additional homes. Retrofitting infrastructure under occupied homes is expensive and disruptive.
Separate public, semi-private, and private zones. Each tiny home needs a clearly defined threshold, a small deck, stoop, or planting buffer that signals “this is mine.” Semi-private zones (shared gardens, courtyards) encourage interaction without forcing it. Public zones (parking, mail kiosks, community buildings) anchor the village but shouldn’t dominate the layout. Builders experienced in building compact structures understand how critical these transitions are.
Spacing and Setback Requirements
Setbacks govern how close structures can sit to property lines, roads, and each other. Most local codes require 5–10 feet between principal structures for fire safety, though some tiny house ordinances reduce this to 3 feet if homes have fire-resistant exterior cladding and no windows on facing walls.
Practical spacing often exceeds code minimums. A 10–15 foot gap between homes allows for:
- Utility trenches (water, sewer, electric) without encroaching on foundations
- Maintenance access for painting, roof work, or skirting repairs
- Privacy buffers so residents aren’t overhearing dinner conversations
- Snow and rain runoff management without funneling water onto a neighbor’s entry
Don’t forget vertical setbacks. If tiny homes are on trailers, they sit higher than site-built structures, plan sight lines accordingly to avoid bedroom windows staring directly into a neighbor’s loft.
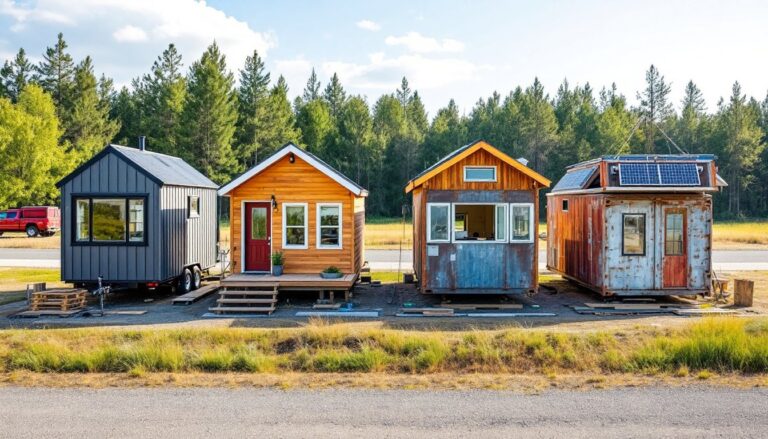
Popular Tiny House Village Layout Configurations
Different site conditions and community goals call for different layout patterns. Here are the most common configurations and where each works best.
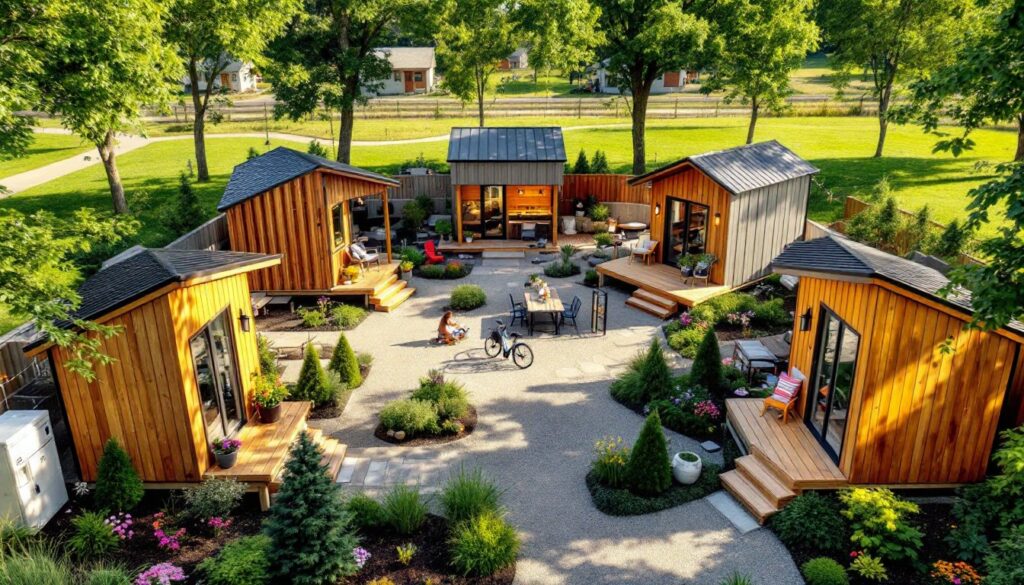
Cluster layout: Groups of 3–6 tiny homes arranged around a shared courtyard or green space. Works well on irregular lots or sloped terrain. Encourages micro-communities within the larger village, but requires careful planning to avoid creating “popular” and “leftover” clusters.
Linear or street layout: Homes line both sides of a central road or pathway, mimicking traditional neighborhood design. Simplifies utility runs and emergency vehicle access. Best for narrow, deep lots. Can feel monotonous without varied setbacks or landscaping.
Radial or spoke layout: Tiny homes radiate from a central hub (community building, pavilion, garden). Maximizes visual connection to shared amenities and shortens walking distances. Requires a relatively flat, open site and doesn’t scale well beyond 12–15 units.
Perimeter layout: Homes ring the property edge, leaving a large central commons. Provides maximum open space for gardens, play areas, or stormwater features. Vehicle access stays on the perimeter, keeping the core pedestrian-only. Effective on square or rectangular parcels but can feel exposed without tree buffers or fencing. Many developers applying modern tiny home methods favor this layout for its efficient land use.
Mixed or hybrid layout: Combines elements from the above, clusters along a linear road, radial courtyards off a perimeter loop. Offers variety and flexibility but demands more design skill to avoid a chaotic footprint.
Planning Shared Amenities and Common Spaces
Shared amenities are what elevate a tiny house village from a parking lot with hookups to an actual community. They also concentrate costs, maintenance responsibilities, and potential conflict, plan them with intention.
Essential shared facilities:
- Bathhouse or shared bathrooms (if individual units lack full plumbing). Include private stalls with locking doors, not open showers. Budget one toilet per 4–5 residents and one shower per 6–8 residents minimum.
- Laundry building. Commercial-grade washers and dryers outlast residential models. Allow 4–6 square feet per resident for machines, folding space, and storage.
- Tool shed or workshop. Shared miter saws, drills, and yard equipment reduce individual clutter. Requires clear checkout systems and maintenance protocols.
- Mail kiosk and package lockers. USPS often won’t deliver to individual tiny homes without assigned street addresses, centralized mail is often mandatory.
Desirable community spaces:
- Pavilion or covered gathering area with electricity, water, and seating for 50–75% of residents.
- Community garden plots. Allocate 100–200 square feet per household if gardening is part of the vision.
- Children’s play area (if families are included). Keep visible from homes for passive supervision.
- Fire pit or outdoor kitchen. Codes may require 15–25 feet clearance from structures and a 3-foot mineral border.
Position high-use amenities (laundry, bathhouse) centrally to minimize maximum walking distance. Locate noisier spaces (workshop, play area) away from bedroom zones. Don’t over-build, unused amenities become maintenance burdens. Resources on compact living design often highlight how shared amenities reduce individual square footage needs.
Infrastructure and Utility Considerations
Utilities are the hidden skeleton of a village layout. Get this wrong and you’ll spend years troubleshooting pressure drops, voltage sags, and frozen pipes.
Water supply: Options include individual meter pads, a master meter with submeters, or a private well system. Individual meters cost more upfront but simplify billing and liability. If using a shared main, size it for peak simultaneous demand, not just total fixture count. A 1.5-inch main typically serves up to 10–12 tiny homes: beyond that, consider 2-inch lines or looped distribution to maintain pressure.
Sewer and septic: Municipal sewer is ideal but not always available. Shared septic systems must be sized for total bedroom count (most codes assume 150 gallons per bedroom per day). A 10-home village with loft bedrooms might require a 2,000–3,000 gallon septic tank and an appropriately sized drainfield. Consult a licensed septic designer, soil percolation tests determine feasibility.
Electrical service: Each tiny home typically draws 30–50 amps if all-electric, less if propane is used for heat and cooking. A 10-unit village needs a 400–600 amp service minimum, plus capacity for shared buildings and outdoor lighting. Trench Schedule 40 PVC conduit at least 18 inches deep (24 inches in cold climates) for underground runs. Hire a licensed electrician to pull permits, this is not a DIY job. Projects following advanced building practices often integrate solar microgrid options to reduce grid dependence.
Stormwater management: Concentrated roofs and impervious surfaces create runoff. Codes often require retention ponds, bioswales, or permeable paving if impervious coverage exceeds 15–25% of the site. Design these features early, they affect grading, lot placement, and landscaping.
Creating Privacy While Maintaining Community Connection
The tension between togetherness and solitude is real in tiny house villages. Layout decisions either ease or amplify this friction.
Use strategic landscaping. Evergreen hedges (3–5 feet tall) screen windows and patios without blocking light or views entirely. Ornamental grasses, trellises with vines, and tiered plantings add visual interest while defining boundaries. Avoid solid fences over 6 feet, they create a bunker mentality.
Stagger home orientations. Don’t line up front doors like a motel. Rotate units 15–30 degrees, vary setbacks, or alternate porch placements so residents aren’t staring directly at each other. This also improves solar access and cross-ventilation.
Differentiate pathways. A resident walking to their own front door shouldn’t feel like they’re crossing someone else’s yard. Use materials (gravel vs. pavers), plantings, or subtle grade changes to mark transitions between shared and private zones. Those exploring varied tiny home designs often notice how entry sequences shape the experience.
Design for acoustic separation. Sound carries. Position bedroom windows away from neighbor’s outdoor living areas. If homes are close, consider sound-dampening fencing (mass-loaded vinyl, dense masonry) or plant buffers. Quiet hours and community agreements help, but layout reduces the need for enforcement.
Provide retreat options. Not every resident will want constant interaction. Include a mix of social and solitary outdoor spaces, a secluded bench, a corner garden plot, a walking path that loops away from the core. Comparing different community models reveals that successful villages offer introverts escape routes.
Finally, involve future residents in layout decisions if possible. A participatory design process surfaces preferences (morning sun vs. afternoon shade, garden access vs. parking proximity) that no planner can guess. It also builds buy-in, which matters when someone’s window ends up 12 feet from the composting toilet enclosure.