Table of Contents
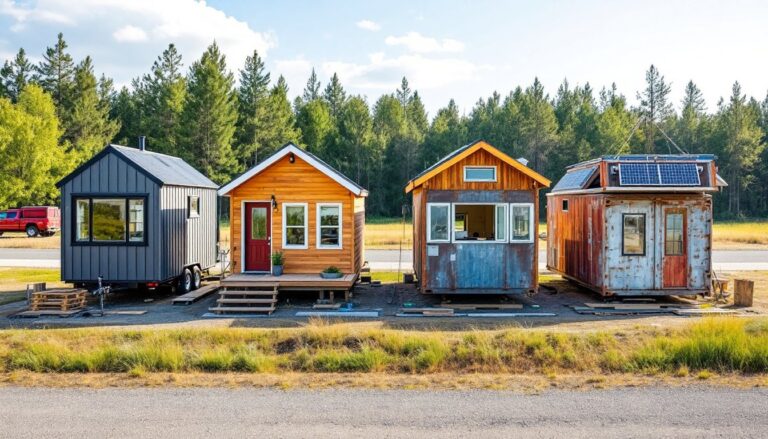
ToggleShipping containers have moved beyond cargo yards and into residential driveways. These corrugated steel boxes, once hauling goods across oceans, now serve as foundations for compact, durable, and surprisingly livable homes. Container tiny homes combine the minimalist appeal of small-space living with industrial-grade construction, offering a turnkey structure that’s cheaper, faster, and often more eco-friendly than stick-built alternatives. Whether someone’s looking to downsize, build a backyard ADU, or create an off-grid retreat, shipping containers provide a ready-made shell with bones strong enough to stack, cut, and customize without compromising structural integrity.
Key Takeaways
- Container tiny homes use retired shipping containers as the structural foundation, typically 20 or 40 feet long, offering a cost-effective alternative that’s 30–50% cheaper than comparable stick-built construction.
- Proper insulation, reinforced steel framing for door and window openings, and moisture control are critical to prevent condensation, thermal bridging, and structural issues in container homes.
- Strategic interior design—including built-in furniture, lofts, and large glass walls—maximizes functionality within 160–320 square feet while creating surprisingly spacious, light-filled living spaces.
- Securing permits and confirming local zoning approval before purchasing a container is essential, as not all municipalities allow container dwellings on residential lots.
- Total build costs range from $20,000–$60,000 for DIY projects or $60,000–$150,000+ for turnkey custom container tiny homes, making them accessible for those downsizing or building ADUs.
- Professional help from welders, structural engineers, and electricians is invaluable during critical phases like cutting openings, installing rough-in systems, and ensuring code compliance.
What Are Container Tiny Homes?
A container tiny home is a residential dwelling built from one or more steel shipping containers, typically measuring 20 feet or 40 feet in length. Standard containers stand 8 feet wide and 8.5 feet tall (high-cube models offer 9.5 feet of interior height). The steel frame, designed to survive stacking and ocean transport, provides a self-supporting structure that can be modified, insulated, and finished into living quarters.
Most builders start with retired containers, units pulled from service after 10–15 years of cargo hauling. These are often graded as “cargo-worthy” (still watertight and structurally sound) or “wind and water tight” (cosmetic rust but intact seals). Avoiding “as-is” containers saves headaches: structural damage or deep corrosion complicates retrofitting.
Containers work as standalone studios, stacked duplexes, or clustered multi-room layouts. Because the corrugated walls are load-bearing on the corner posts and top/bottom rails, cutting large openings requires adding steel headers or reinforcing frames, a job best handled by a welder or structural engineer familiar with ISO container specs. Some jurisdictions classify container homes as manufactured housing or modular dwellings, triggering specific permitting paths under the International Residential Code (IRC). Check local zoning before delivery: not all municipalities allow container dwellings on residential lots.
Why Choose a Shipping Container Tiny Home?
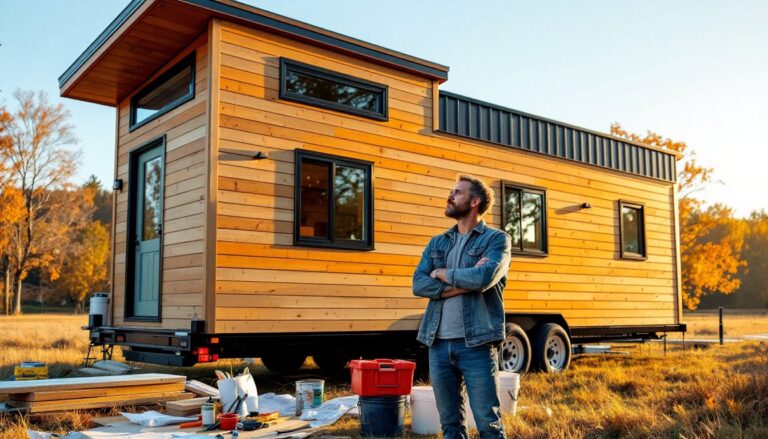
Shipping containers appeal to builders looking for speed, durability, and reuse. The steel shell arrives intact, eliminating the framing phase that dominates traditional builds. Containers resist pests, fire, and weather better than wood framing, and their modular dimensions simplify transport and placement on difficult sites, hillsides, narrow lots, or remote properties with limited road access.
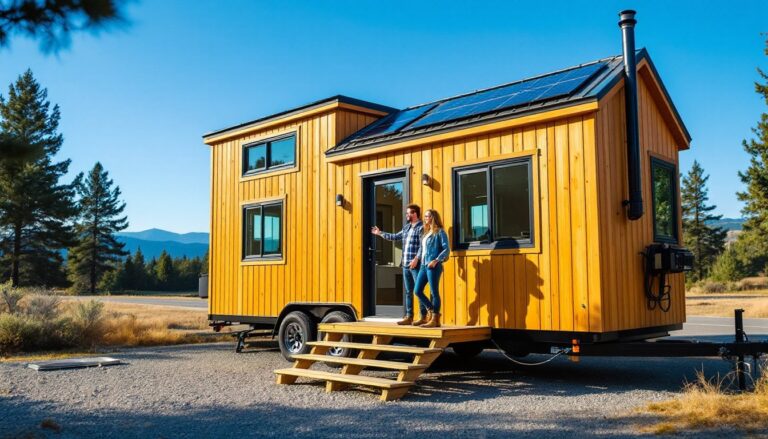
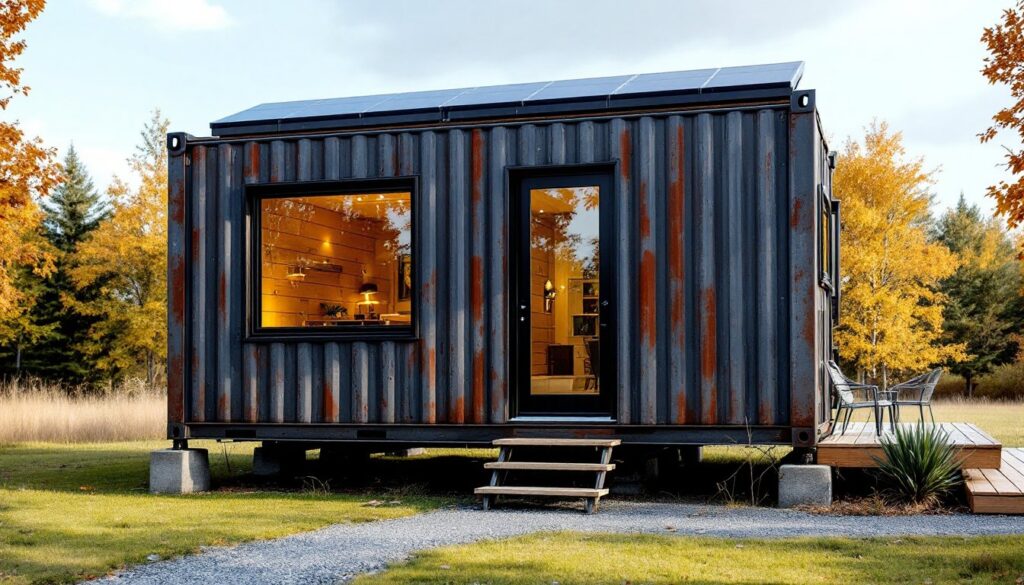
Sustainability plays a role, too. Reusing a container diverts roughly 8,000 pounds of steel from scrap yards (though new-build “one-trip” containers are also sold). The embodied energy in that steel is already spent, making it a lower-impact choice than milling fresh lumber. Containers also lend themselves to off-grid setups, pairing well with solar panels, rainwater catchment, and composting systems.
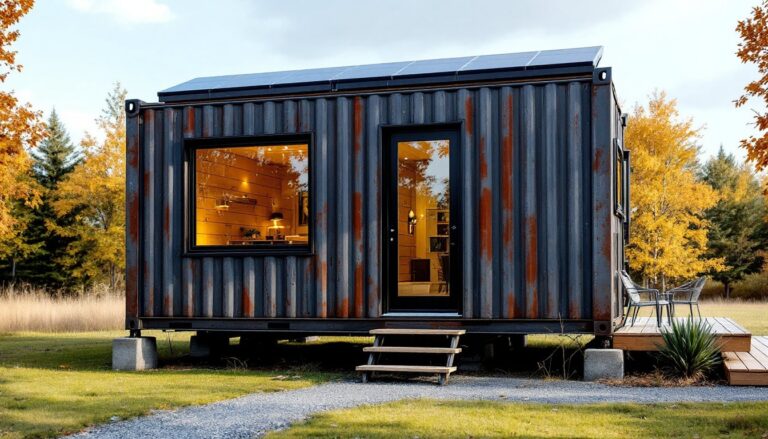
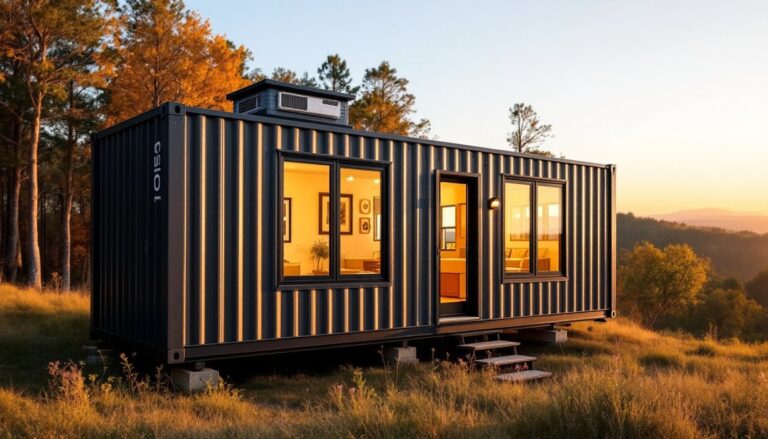
From a design standpoint, the industrial aesthetic, exposed corrugation, steel detailing, porthole windows, has moved from niche to mainstream. Many innovative tiny home layouts incorporate large glass walls by cutting away entire side panels and reinforcing the remaining structure, creating bright, open interiors that defy the “shipping container” stereotype.
Cost Savings and Budget Flexibility
A used 20-foot container typically costs $1,500–$3,000: a 40-footer runs $3,500–$6,000, depending on condition and location. New one-trip units cost more but arrive with minimal rust and original paint. The container itself is just the starting point, insulation, windows, doors, plumbing, electrical, and finishes add up quickly.
Total build costs for a finished container tiny home range from $20,000 to $60,000 for a DIY project, or $60,000 to $150,000+ for a turnkey custom build. That’s often 30–50% less than comparable stick-built square footage, though final numbers depend on finishes, site prep, utility hookups, and whether the builder hires pros or swings a hammer themselves. Budgets stretch further when owners handle insulation, drywall, and trim work, reserving contractor hours for welding, electrical rough-in, and HVAC. Foundation costs vary, pier footings for a single container might run $1,000–$2,500, while a full slab can hit $5,000+ depending on soil conditions and frost depth.
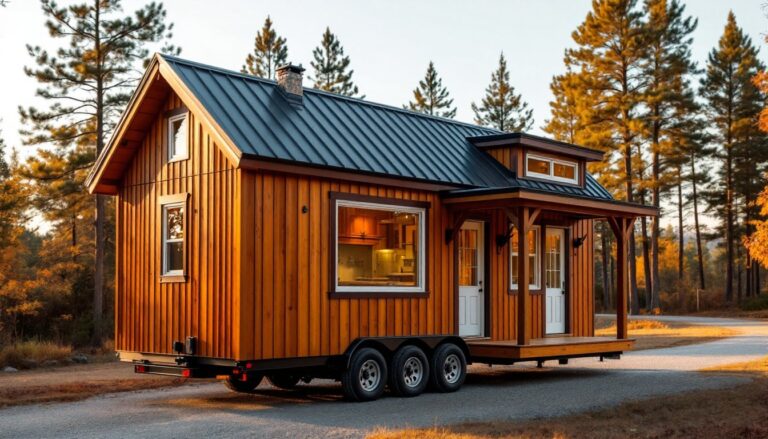
Designing Your Container Tiny Home: Layout and Floor Plan Ideas
Designing within 160 or 320 square feet (for 20- or 40-foot containers) demands ruthless space planning. Start by identifying non-negotiables: sleeping area, kitchen galley, bathroom, and storage. Many builders use a single 40-foot container to create a studio layout, kitchen and bath at one end, sleeping loft or Murphy bed at the other, with a small living zone in between.
For more room, stack or join containers. Two 20-footers placed end-to-end yield 320 square feet on one level: stacking them creates a two-story, 320-square-foot footprint with separate sleeping and living floors. Joining containers side-by-side (cutting through shared walls) opens up wider floor plans but requires engineered steel framing to maintain structural integrity after removing load-bearing corrugation.
Key layout considerations:
- Ceiling height: Standard 8.5-foot interiors drop to roughly 7.5–8 feet after insulation and finish ceiling. High-cube containers (9.5 feet) give breathing room for ducts, recessed lighting, or sleeping lofts.
- Window and door placement: Cutting large openings weakens the container unless properly reinforced. Plan openings on non-load-bearing walls (long sides) or add headers welded to the frame.
- Plumbing core: Clustering the kitchen sink, bathroom, and any laundry in one zone simplifies plumbing runs and venting, especially if the home sits on a pier foundation with exposed underside.
- Insulation thickness: Spray foam, rigid foam panels, or mineral wool all reduce usable width. Budget 3–4 inches on walls and ceiling, more in cold climates targeting R-20+ thermal performance.
Applying proven building techniques helps maximize every inch. Built-in furniture, fold-down tables, under-stair storage, platform beds with drawers, turns dead space into functional assets. Vertical storage, magnetic wall strips, and ceiling-mounted racks keep floors clear. Natural light matters: even small homes feel spacious with well-placed windows and skylights. Some builders cut entire side panels and install floor-to-ceiling glass, turning the container into a modern pavilion.
Essential Steps to Build or Buy a Container Tiny Home
Building a container tiny home breaks into distinct phases, site prep, container acquisition, structural modifications, systems installation, insulation, and finishes. Each step requires planning, permits, and often professional help.
1. Secure permits and site approval.
Most jurisdictions require building permits for container homes, especially if they’re permanent dwellings with utility hookups. Zoning rules may restrict container homes in certain districts or require design review. Contact the local building department early: some areas classify containers as accessory dwelling units (ADUs) with different setback and size rules.
2. Prepare the foundation.
Containers need level, load-bearing foundations. Common options include concrete piers (four to eight, depending on container length), strip footings under each corner rail, or a full slab. Piers work well for sloped sites and allow airflow underneath: slabs provide finished floors and easier utility rough-in. Check frost depth and soil bearing capacity, most residential soil supports 1,500–2,000 psf, adequate for distributed container loads.
3. Source and inspect the container.
Buy from reputable dealers who deliver and can certify structural condition. Inspect for rust, dents, and previous cargo residue (some containers hauled chemicals or food products). Containers certified cargo-worthy or IICL (Institute of International Container Lessors) offer the best structural assurance. Delivery requires truck access and a clear path: cranes or forklifts place the container on the foundation.
4. Cut openings and reinforce the frame.
This is where a professional welder or experienced tiny home builder becomes invaluable. Cutting doors, windows, or joining containers weakens the corrugated walls. Steel box tube headers (4×4 or 6×6 depending on span) are welded above and below openings to transfer loads back to the corner posts. Always wear PPE: welding helmet, leather gloves, steel-toed boots, and respirator when cutting painted or galvanized steel.
5. Insulate and seal.
Steel containers are thermal conductors, uninsulated, they’re ovens in summer and freezers in winter. Closed-cell spray foam (2–3 inches) is common for walls and ceilings, providing both insulation and vapor barrier. Rigid foam boards or mineral wool batts work too but require separate vapor barriers and framing. Pay special attention to thermal bridging at steel studs or ribs: unbroken insulation layers prevent condensation.
6. Install rough-in systems.
Run electrical (following National Electrical Code standards, typically 100A service for a tiny home), plumbing (PEX is flexible and freeze-resistant), and HVAC (mini-splits are efficient and don’t require ductwork). If off-grid, size solar arrays and battery banks to match load calculations. Propane is common for cooking and heating in remote setups.
7. Finish interior and exterior.
Drywall, plywood paneling, or metal panels cover insulation. Flooring options include luxury vinyl plank (waterproof, easy install), engineered hardwood, or polished concrete if on a slab. Exterior paint or cladding protects the steel: marine-grade epoxy or rust-inhibiting primers extend lifespan. Some owners embrace the raw container look, applying only clear sealant.
Buying a turnkey container home skips most of these steps. Prefab companies deliver finished units with utilities stubbed, ready to connect. Costs are higher, but timelines shrink from months to weeks. Evaluate builders on warranty, code compliance, and whether they handle permitting in your jurisdiction.
Common Challenges and How to Overcome Them
Container tiny homes aren’t plug-and-play. Builders encounter recurring hurdles, most of which are solvable with planning and the right expertise.
Permitting and zoning rejection.
Some municipalities don’t recognize shipping containers as approved building materials or ban them outright due to aesthetic concerns. Solve this by presenting engineered plans, demonstrating code compliance (fire resistance, egress windows, foundation specs), and showing finished examples. Joining a tiny home community or building in progressive zoning districts improves odds. In rural areas, fewer restrictions often apply.
Condensation and moisture control.
Steel containers sweat when interior warmth meets cold exterior walls. Without proper vapor barriers and continuous insulation, condensation leads to mold and rust. Closed-cell spray foam is the most foolproof solution: if using batts, install 6-mil poly vapor barrier on the warm side and ensure no gaps. Ventilation, bath fans, range hoods, operable windows, removes moisture at the source.
Limited width and ceiling height.
Eight feet wide feels narrow, especially after wall finishes eat another few inches. Combat claustrophobia with strategic design: light colors, large windows, mirrors, and minimal partitions. Lofted sleeping areas maximize floor space but aren’t ADA-compliant. For taller ceilings, high-cube containers or cutting the floor to drop it below the bottom rails (complex and requires structural engineering) add headroom.
Transporting and placing the container.
Standard tractor-trailers deliver containers, but tight streets, low-hanging power lines, or soft ground complicate access. Confirm delivery logistics before purchase. Crane placement costs extra, budget $500–$1,500 depending on distance from the truck to foundation. Effective planning strategies account for site access, turning radius, and overhead clearance early in the process.
Thermal performance in extreme climates.
Steel containers struggle in very hot or very cold regions without aggressive insulation. In deserts, reflective roof coatings and shade structures reduce solar gain. In cold climates, R-30+ insulation and below-grade or earth-sheltered placement help. Mini-split heat pumps handle both heating and cooling efficiently, but propane or wood stoves provide backup in off-grid scenarios.
Resale and financing challenges.
Lenders sometimes balk at financing container homes due to appraisal difficulties and non-traditional construction. Securing a construction loan or personal loan instead of a conventional mortgage may be necessary. Resale values vary widely, well-designed, permitted, and finished container homes in desirable areas hold value: DIY projects in restrictive zoning may struggle. Documenting permits, inspections, and using quality tools and materials strengthens future marketability.
Conclusion
Container tiny homes deliver a rare combination: structural resilience, design flexibility, and cost efficiency. They’re not without challenges, zoning, insulation, and access require upfront problem-solving, but for builders willing to weld, wire, and think creatively within a steel box, the payoff is a durable, distinctive home that can be placed almost anywhere. Whether someone is comparing tiny homes against traditional builds or eyeing 2026’s latest trends, containers remain a compelling option for anyone serious about downsizing without sacrificing quality or style.